Fortanix Connector
Supported version: Cloud
API Rate Limit: No Limit
Supported Authentication: Custom authentication
IMPORTANT: Please make sure your Fortanix instance must be accessible from the Gathr Machine.
To configure Fortanix using Custom authentication, follow the steps below:-
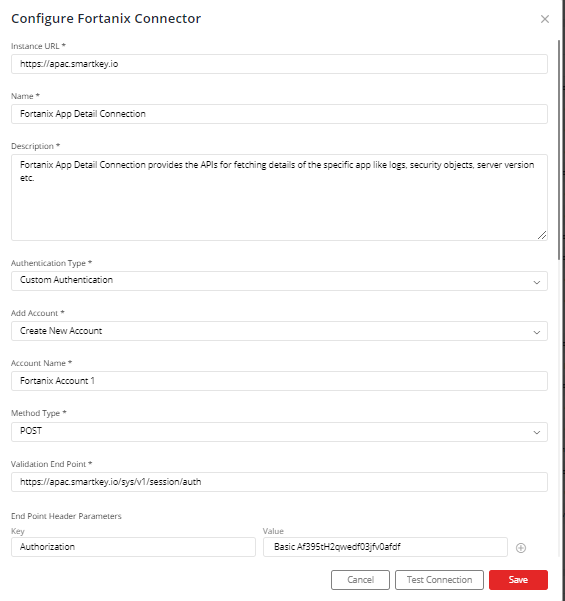
Enter Fortanix URL: Smartkey
Select “Create New Account” and add a user-friendly name for account for e.g. “Fortanix Account 1”.
Select “Method Type” as “POST”.
Enter “Validation End Point” as https://apac.smartkey.io/sys/v1/session/auth
In “End Point Header Parameters” Enter:
“Key”: Authorization
“Value”: Basic
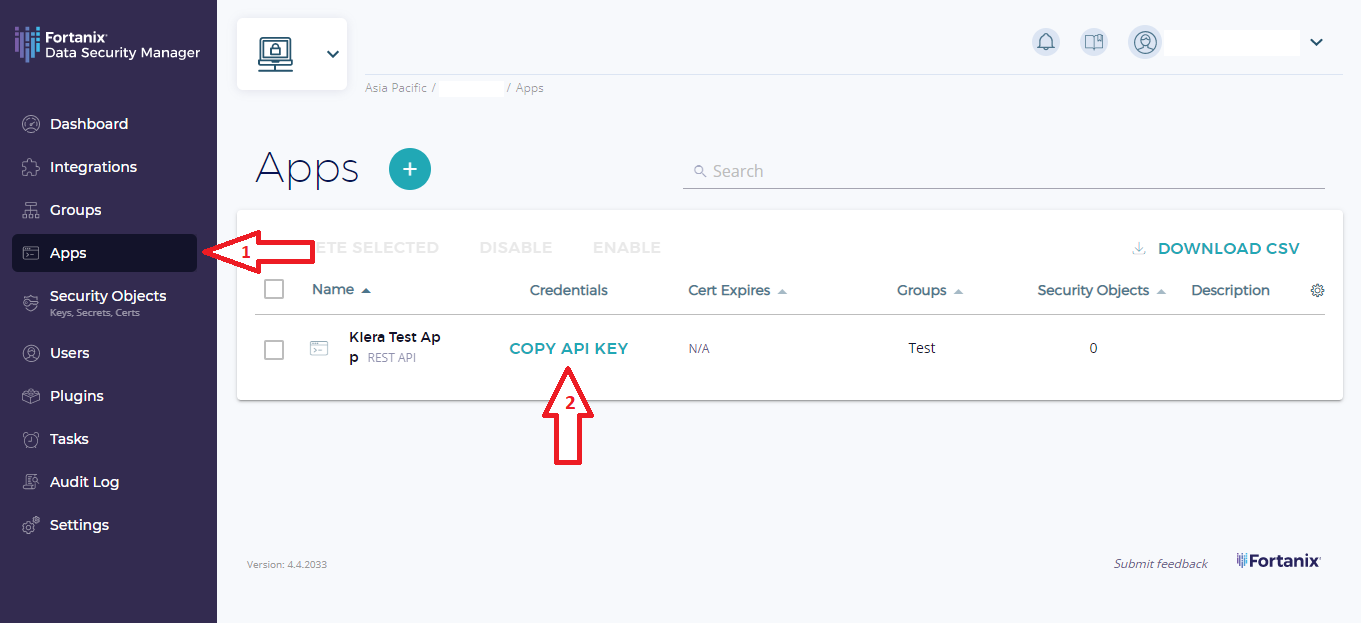
To get your API Key follow the steps below:
Step 1. Login into your Fortanix.
Step 2. Go to 'Apps' tab.
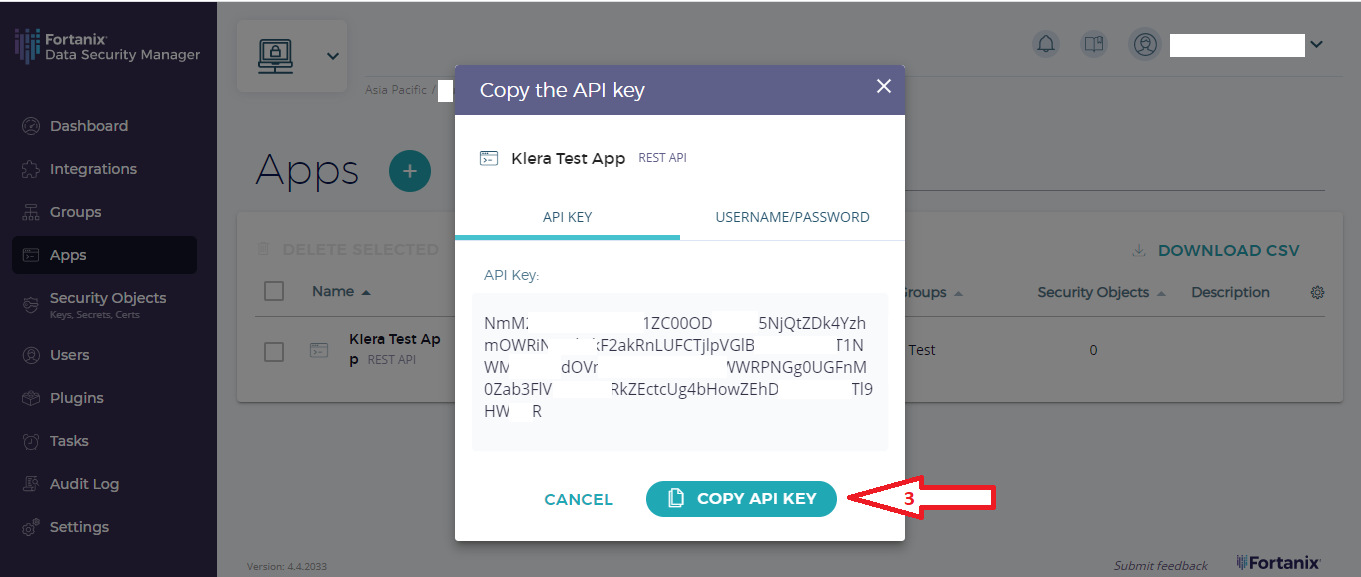
Step 3. Under the required app, click on the button 'COPY API KEY'. In the pop up click on button 'COPY API KEY'. This will copy your API Key on your clipboard.
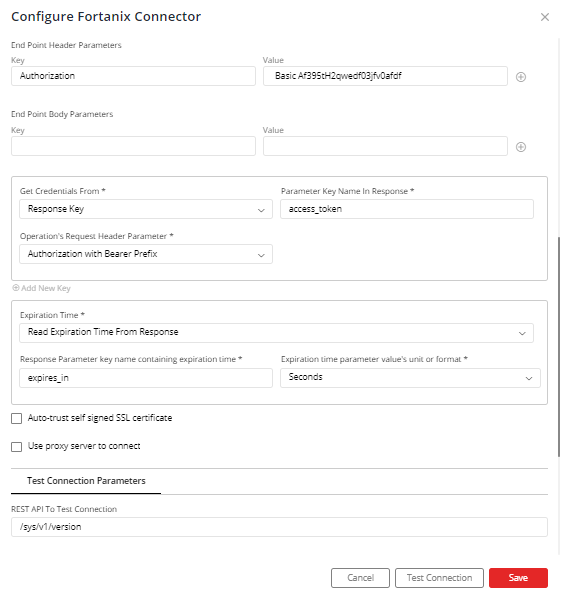
In “Select Credentials From” select “Response Key”.
In “Parameter Key Name In Response” enter value as “access_token”.
In “Operation’s Request Header Parameter” select “Authorization with Bearer Prefix”.
In “Expiration Time” select “Read Expiration Time From Response”.
In “Response Parameter key name containing expiration time” enter value as “expires_in”.
In “Expiration time parameter value’s unit or format” select “Seconds”.
Click on “Save”.
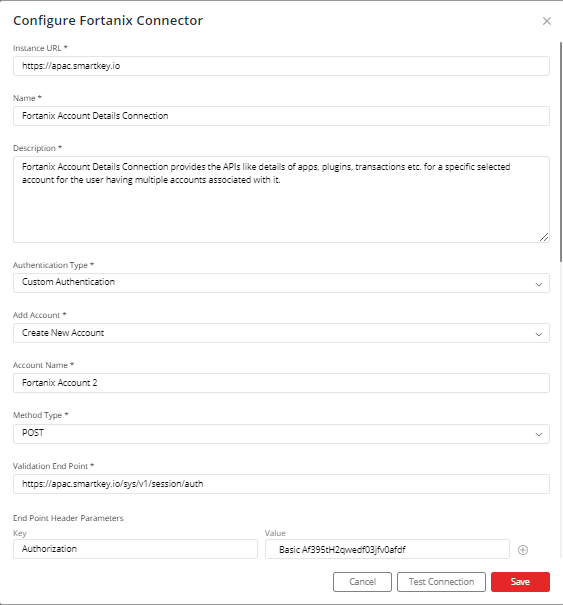
On successful saving the connection, another form will open for configuring the second connection.
Follow the steps below:
Enter Fortanix URL: Smartkey
Select “Create New Account” and add a user-friendly name for account for e.g. “Fortanix Account 2”.
Select “Method Type” as “POST”.
Enter “Validation End Point” as https://apac.smartkey.io/sys/v1/session/auth
In “End Point Header Parameters” Enter:
“Key”: Authorization
“Value”: Basic
For this connection, your API KEY is the Base64 Encoded value of your login username and password in the form of “
”. For example if your username is “sampleusername@klera.io” and your password is “SamplePassword”, then you have to encode “sampleusername@klera.io:SamplePassword” into Base64 encoding i.e. “c2FtcGxldXNlcm5hbWVAa2xlcmEuaW86U2FtcGxlUGFzc3dvcmQ=”. This will be your API KEY for this connection.
You can use any tool for Base64 encoding. For example : Base64 Encode
In “Select Credentials From” select “Response Key”.
In “Parameter Key Name In Response” enter value as “access_token”.
In “Operation’s Request Header Parameter” select “Authorization with Bearer Prefix”.
In “Expiration Time” select “Read Expiration Time From Response”.
In “Response Parameter key name containing expiration time” enter value as “expires_in”.
In “Expiration time parameter value’s unit or format” select “Seconds”.
Click on “Save”.

If you have any feedback on Gathr documentation, please email us!